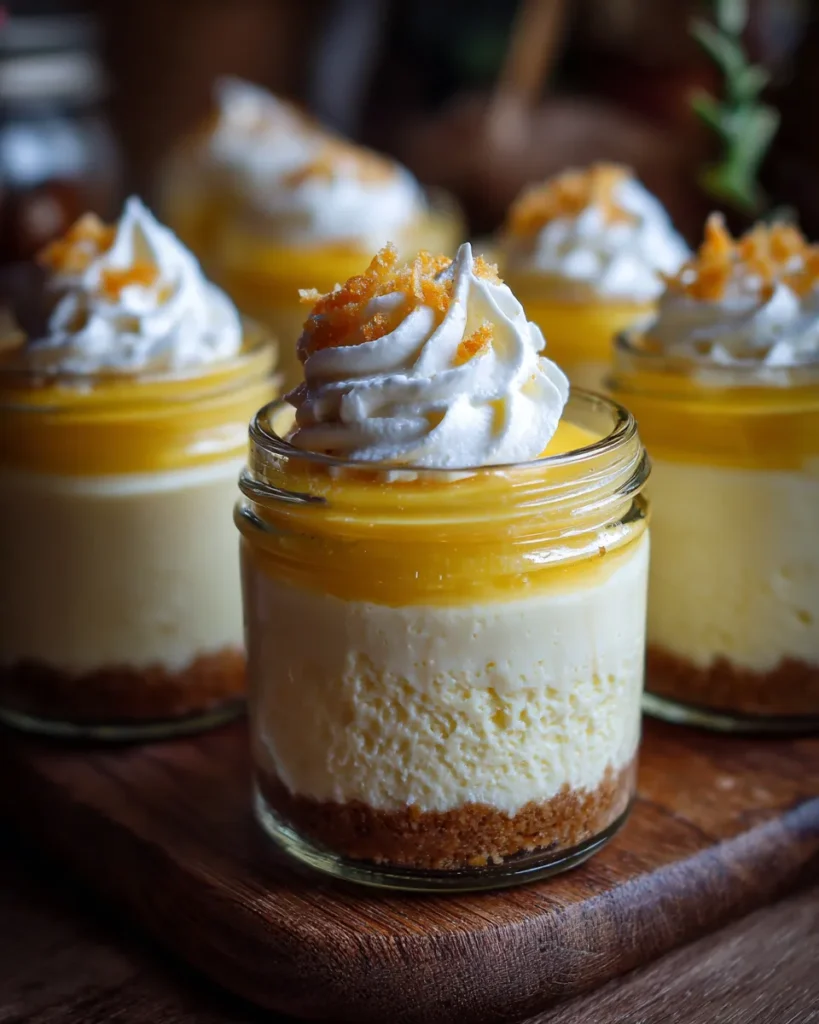
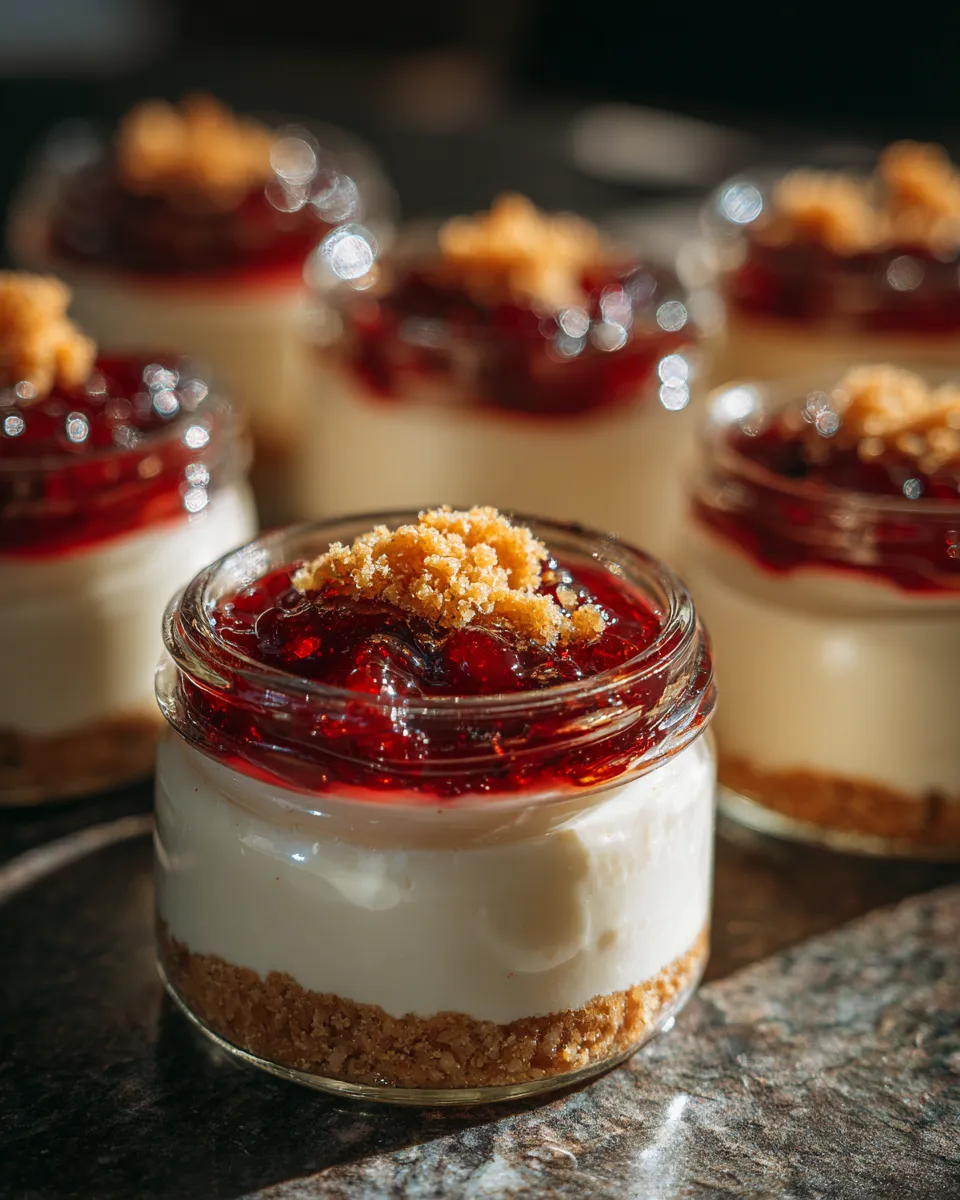
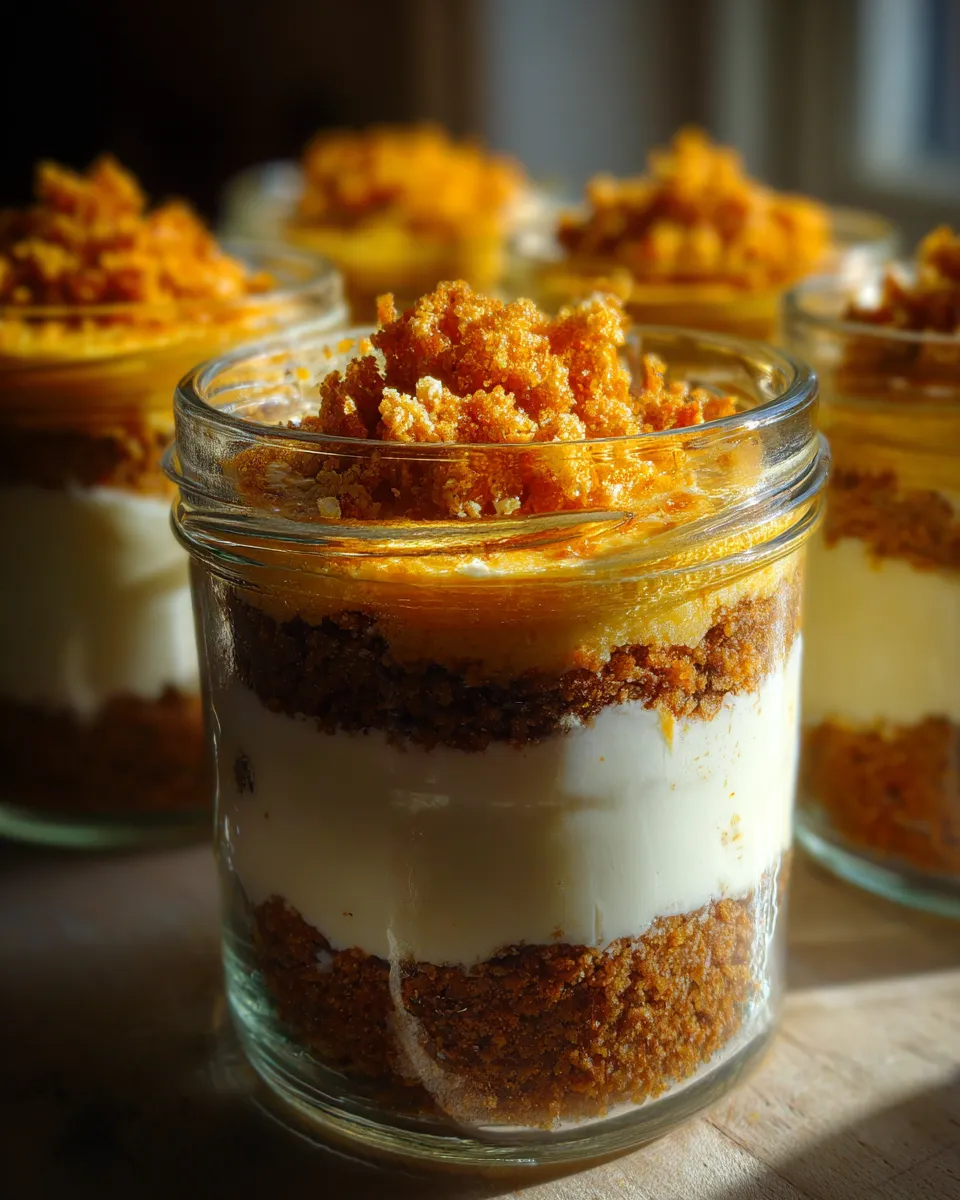
There’s just something magical about diving into a creamy, dreamy cheesecake that didn’t even require turning on an oven. That first bite of my no-bake cheesecake jars brings me right back to sunny afternoons on the porch, where I first played around with this recipe. The layers of velvety cheesecake, crumbly crust, and sweet topping all in one little jar? Pure joy. If you’re craving a quick and foolproof dessert that feels fancy but is surprisingly simple, my no-bake cheesecake jars are going to become your new go-to. Trust me, once you try this, you’ll never want to wait hours for the traditional cheesecake to bake and chill.
No-Bake Cheesecake Jars: Why This Recipe Works & Ingredients
- 1 ½ cups graham cracker crumbs
- 6 tablespoons unsalted butter, melted
- 1/3 cup granulated sugar
- 16 ounces (2 packages) cream cheese, softened
- 1 cup powdered sugar, sifted
- 1 teaspoon vanilla extract
- 1 cup heavy whipping cream, cold
- Fresh berries or pie filling (optional for topping)
Now, why these ingredients? It starts with graham cracker crumbs mixed with melted butter. Butter acts like the glue that holds the crust together and adds that rich, buttery flavor that you want to complement the creamy cheese layer. Using granulated sugar here gives just the right sweetness without overpowering. For the filling, cream cheese is your best friend. It’s the heart of the cheesecake, providing smoothness and richness, while the powdered sugar adds a gentle sweetness without grit. The vanilla extract brightens everything up with a warm floral note.
The whipped cream folded into the cream cheese mixture is the secret to that dreamy, cloud-like texture that sets this cheesecake apart from heavier, oven-baked versions. It lightens the dense cream cheese and creates that melt-in-your-mouth feel that makes no-bake cheesecakes absolutely irresistible.
PrintNoBake Cheesecake Jars
NoBake Cheesecake Jars offer a simple creamy dessert solution perfect for quick delicious treats anyone can make at home
- Prep Time: 20 minutes
- Total Time: 4 hours 20 minutes
- Yield: 6 jars
- Category: Dessert
- Cuisine: American
Ingredients
Instructions
Notes
There’s just something magical about diving into a creamy, dreamy no-bake cheesecake jar with layers of velvety cheesecake, crumbly crust, and sweet topping all in one little jar. A quick and foolproof dessert that feels fancy but is surprisingly simple.
No-Bake Cheesecake Jars: Step-by-Step Instructions
- Prepare the crust: In a medium bowl, combine the graham cracker crumbs, melted butter, and granulated sugar. Stir until the crumbs look evenly moist and sandy.
- Assemble the base: Spoon about 2 tablespoons of the crust mixture into the bottom of each jar. Press it down firmly with the back of a spoon or the bottom of a small glass. Getting this packed tight helps create that sturdy base you want to bite into.
- Make the filling: In a large bowl, beat the softened cream cheese with an electric mixer on medium speed until smooth. This can take a few minutes, but don’t rush—you want no lumps here.
- Add the powdered sugar and vanilla extract, and continue beating until everything is combined and smooth.
- In a separate chilled bowl, whip the heavy cream until soft peaks form—this means when you lift the beaters, the cream holds a soft peak that curls over.
- Gently fold the whipped cream into the cream cheese mixture. It might look a little curdled or uneven at first, but keep folding carefully until fully incorporated. This step gives you that fluffy texture.
- Layer the jars: Spoon or pipe the cheesecake filling over the crust in each jar, dividing it evenly. Smooth out the top with a spoon.
- Chill: Cover the jars with lids or plastic wrap and place them in the refrigerator for at least 4 hours or overnight. This allows the cheesecake to set and thicken perfectly.
- Serve: When ready to serve, add fresh berries or your favorite pie filling on top for a pop of color and extra flavor.
No-Bake Cheesecake Jars: Tips for Success
- Softened cream cheese is key: If the cream cheese is too cold, it won’t mix smoothly and you’ll end up with lumps. Let it sit out for about 30 minutes or soften slightly in the microwave at low power.
- Don’t overbeat your whipped cream: Overwhipping can turn cream grainy or form butter. Whip just until soft peaks form for the best texture.
- Press the crust firmly: To avoid a crumbly base, pack the crumb mixture tightly into the jars. A small glass or your fingers work well here.
- Use fresh ingredients: Especially the cream, for the best rise and texture.
- Chill long enough: Cutting into the jars too soon can result in a runny filling. Patience pays off!
No-Bake Cheesecake Jars: Storage & Reheating

One of my favorite things about these no-bake cheesecake jars is how easy they are to store and serve later. You can keep these jars in the fridge for up to 4 days—it’s a perfect make-ahead option for parties or weeknight treats. Make sure each jar is tightly sealed to avoid absorbing any fridge odors.
Since this is a no-bake cheesecake, reheating isn’t really part of the plan. These are best served chilled straight from the fridge. If your filling feels too firm after sitting for a few days, just let the jars sit on the counter for about 10 minutes before diving in. This softens the cream cheese slightly and brings out the full flavor.
No-Bake Cheesecake Jars: FAQ
Can I use flavored cream cheese for different tastes?
You can, but keep it mild. Flavored cream cheeses (like strawberry or herb) may alter the texture slightly and compete with the vanilla. If you want to experiment, try mixing just a small amount and taste as you go.
What can I use instead of graham cracker crumbs for the crust?
Digestive biscuits, vanilla wafers, or even crushed pretzels work well. Pretzels add a salty kick that pairs nicely with the sweet filling.
Is it okay to use low-fat cream cheese in this recipe?
Low-fat cream cheese can change the texture and flavor, often making it less creamy and a bit tangier. I recommend using full-fat cream cheese for that silky, rich cheesecake feel.
How long should I whip the heavy cream?
Whip it until soft peaks form—starts to hold shape but still feels soft when you lift the whisk. This usually takes about 2-3 minutes with an electric mixer on medium-high speed.
Can I freeze these cheesecake jars?
You can freeze no-bake cheesecake, but the texture may change slightly after thawing, sometimes becoming a bit grainy. If you freeze, wrap jars tightly and thaw overnight in the fridge for best results.
Nutritional Information
Each jar (assuming 6 jars in total) roughly contains:
- Calories: 350
- Fat: 25g (mostly from butter and cream cheese)
- Protein: 5g
- Carbohydrates: 22g (includes sugar from the crust and filling)
Note: These are rough estimates and can vary depending on ingredients and portion sizes.
No-Bake Cheesecake Jars: Wrapping Up
Making no-bake cheesecake jars has become one of my simplest pleasures in the kitchen. There’s this lovely excitement every time I uncap a jar and see those creamy layers ready to be devoured. Whether you’re making it for a casual treat or a special occasion, these jars are all about easy prep and big flavor. I’d love to hear how yours turn out or if you put your own twist on them—leave a comment below and rate the recipe if you try it! Let’s keep sharing the joy of simple, luscious desserts.