Stuffed Mini Pumpkins are one of my favorite fall treats to make. They bring that cozy autumn feeling right to your table with their perfect little size and festive look. I love how they make an impressive yet simple centerpiece for any meal. The best part? They’re packed with a delicious filling that combines savory ingredients, turning ordinary pumpkins into a fun feast. I’ll walk you through every step so you’ll feel confident making these for your family or guests. Trust me, once you try them, you’ll want to make stuffed mini pumpkins again and again.
Ingredients for Stuffed Mini Pumpkins
Here’s a clear, straightforward list of what you’ll need. I’ve noted exact measures and any prep needed to keep things smooth in your kitchen:
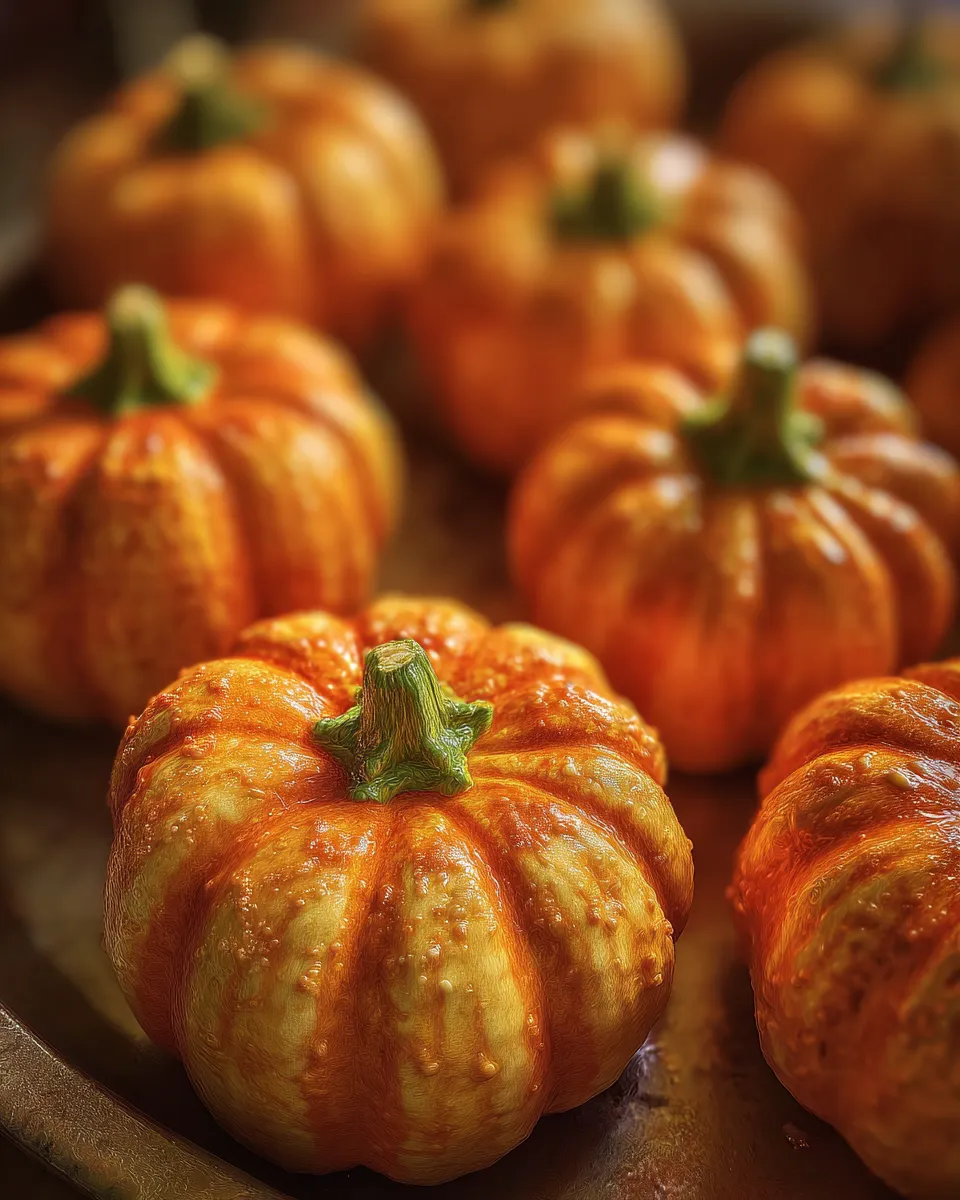
- 4 to 6 mini pumpkins (about 4-6 inches in diameter)
- 1 cup cooked quinoa (rinsed and cooled)
- 1/2 cup diced yellow onion
- 2 cloves garlic, minced
- 1 cup diced mushrooms (cremini or button)
- 1/2 cup dried cranberries
- 1/2 cup chopped pecans or walnuts
- 1/2 cup shredded sharp cheddar cheese
- 2 tablespoons olive oil
- 1 teaspoon dried thyme
- Salt and fresh ground black pepper, to taste
- Optional: 1/4 cup chopped fresh parsley for garnish
Stuffed Mini Pumpkins That Bring 5 Incredible Fall Flavors

Stuffed Mini Pumpkins packed with 5 fall flavors to warm your soul and make every bite unforgettable this season
- Prep Time: 20 minutes
- Cook Time: 40 minutes
- Total Time: 60 minutes
- Yield: 4 to 6 servings
- Category: Dinner
- Cuisine: American
Ingredients
Instructions
Notes
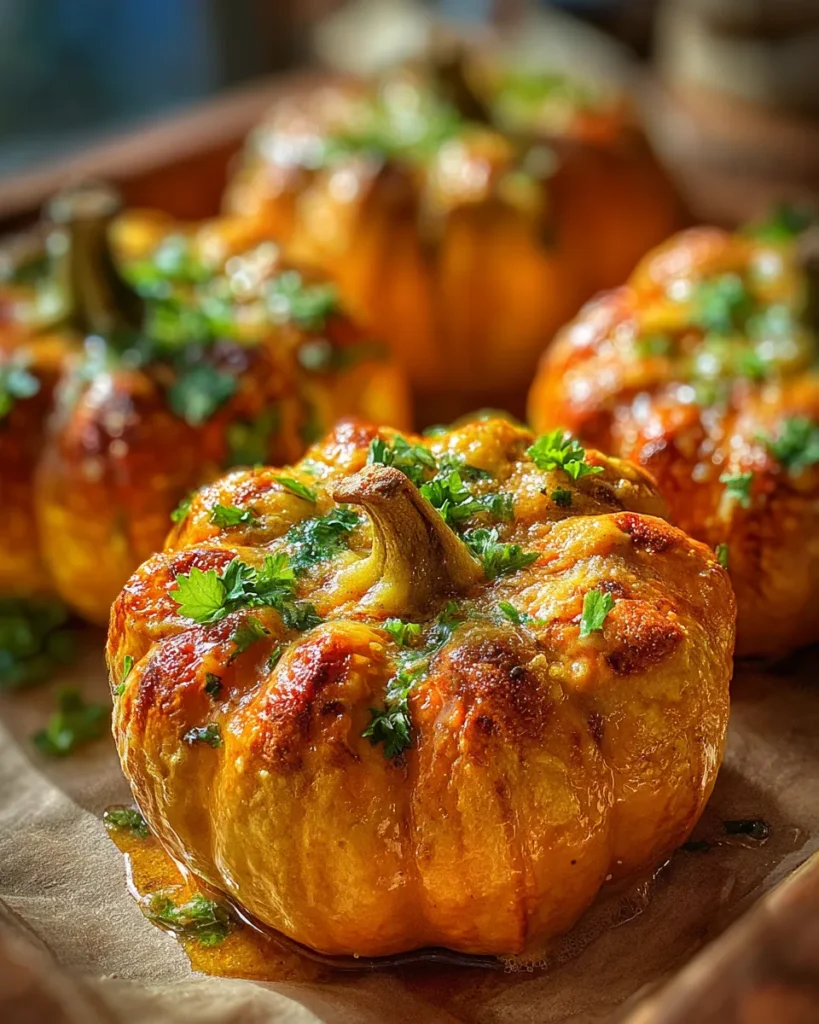
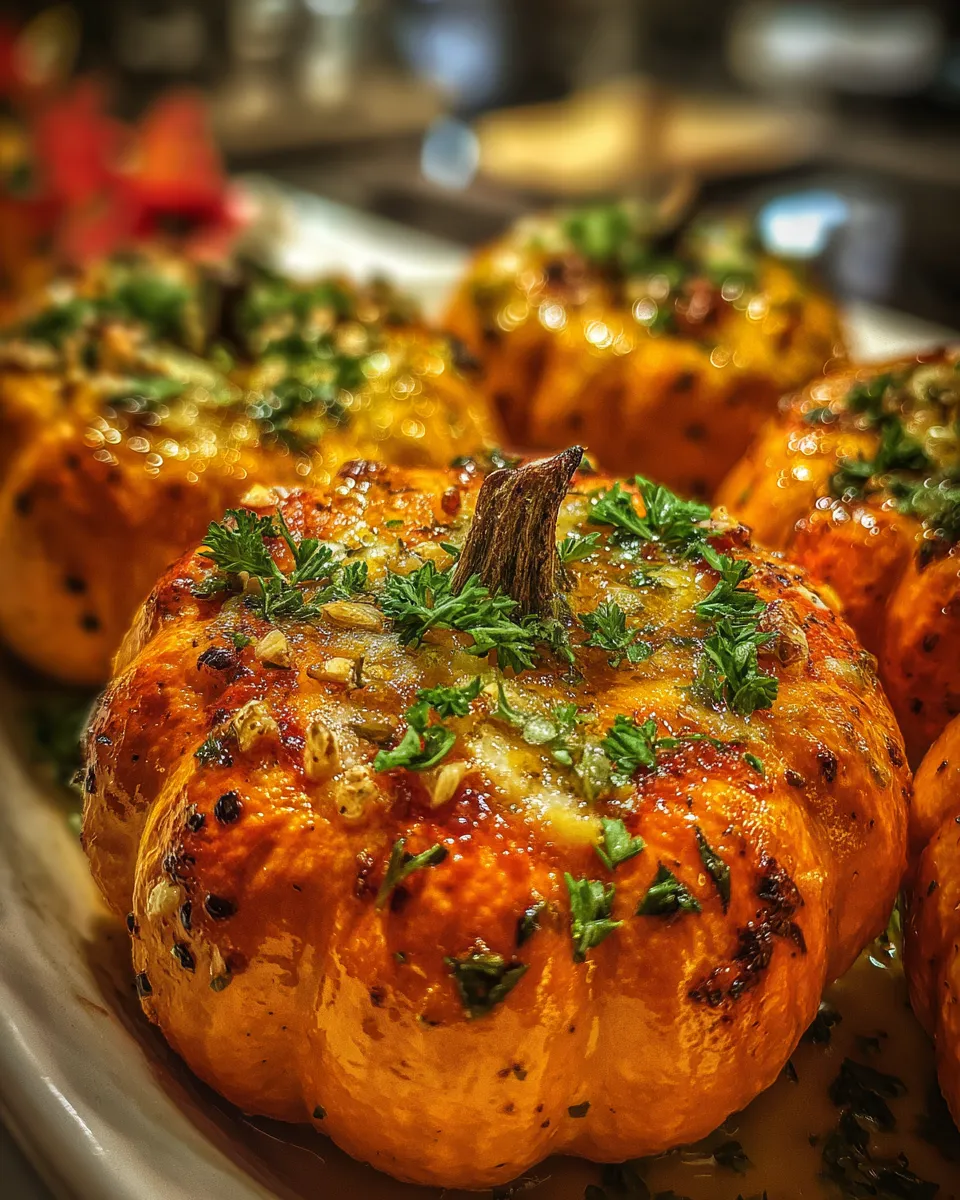
Stuffed Mini Pumpkins are a cozy fall treat featuring mini pumpkins filled with a delicious savory quinoa mixture enhanced with mushrooms, cranberries, nuts, and cheddar cheese. Perfect as an impressive centerpiece or individual servings with festive autumn flavors.
How to Prepare Stuffed Mini Pumpkins
Stuffed mini pumpkins might look fancy, but making them is pretty straightforward. Here’s my step-by-step approach that has never failed me:
- Preheat your oven to 375°F (190°C). This timing is perfect because it allows the pumpkins to roast until tender while the filling cooks.
- Prepare the mini pumpkins: Start by slicing off the tops just wide enough to scoop out the insides. Don’t discard the tops—you’ll use them as lids later. Use a spoon to carefully remove seeds and stringy pulp, creating a hollow cavity for your filling.
- Roast the pumpkins: Brush the insides lightly with olive oil and season with a pinch of salt and pepper. Place the pumpkins cut side down on a baking sheet and roast for about 20 minutes until just tender but still holding shape. This helps avoid soggy pumpkins and preserves their structure.
- Make the filling: While pumpkins roast, heat olive oil in a skillet over medium heat. Add diced onions and minced garlic, sautéing until translucent and fragrant, around 3-4 minutes.
- Stir in mushrooms and cook until they release moisture and start browning, about 5-6 minutes. Then add dried cranberries, chopped nuts, cooked quinoa, dried thyme, salt, and pepper. Cook for another 2 minutes to combine flavors.
- Stuff the pumpkins: Remove pumpkins from the oven and flip them over carefully. Fill each pumpkin cavity generously with the quinoa mixture. Sprinkle shredded cheese on top of each filled pumpkin.
- Bake again: Place the stuffed pumpkins back on the baking sheet. Put the tops back on as lids and bake for an additional 15 minutes until the cheese melts and the filling is heated through.
- Garnish and serve: Remove from oven, let cool for 5 minutes, then garnish with fresh parsley if you like. Serve warm for the best flavor.
Why You’ll Love Stuffed Mini Pumpkins
- Impressive presentation with minimal effort
- Perfect fall flavors blending savory, sweet, and nutty
- Nutritious filling with quinoa, veggies, and nuts
- Easy to customize—you can swap out nuts or add spices
- Individual servings that don’t require extra plates or bowls
- Great way to use seasonal produce creatively

Tips for Success with Stuffed Mini Pumpkins
- Choose pumpkins that are firm and free of soft spots for the best texture and appearance.
- Don’t overstuff the pumpkins; leave a little space at the top so the cheese melts nicely without overflowing.
- If you want a smoother filling texture, try chopping the mushrooms and nuts a bit finer.
- Keep an eye on the pumpkins during roasting – don’t let them get mushy or collapse.
- Warm leftovers gently in the oven to keep the pumpkin soft without drying out the filling.
FAQ About Stuffed Mini Pumpkins
Can I prepare stuffed mini pumpkins ahead of time?
You can prepare the filling a day in advance and store it in the fridge. Scoop it into the pre-roasted pumpkins just before baking. This saves you time and keeps the pumpkins fresh and firm.
What are some good alternatives for the filling in stuffed mini pumpkins?
Try swapping quinoa for rice, couscous, or even wild rice. For a vegetarian option, add roasted chickpeas or lentils. You can also experiment with different herbs like sage or rosemary.
Can I make stuffed mini pumpkins vegan?
Yes, you can. Skip the cheese or use a vegan cheese alternative. Also, verify that your cooking methods and seasonings align with your preferences.
How long can I store leftovers?
Keep leftovers in an airtight container in the fridge for up to 3 days. Reheat gently in the oven to maintain the pumpkin’s texture and warmth of the filling.
Are all mini pumpkins edible?
Most mini pumpkins sold for cooking are edible and firm. But avoid ornamental ones that might be waxed or treated. When in doubt, check packaging or ask your vendor.